Category Archives: Home Improvement

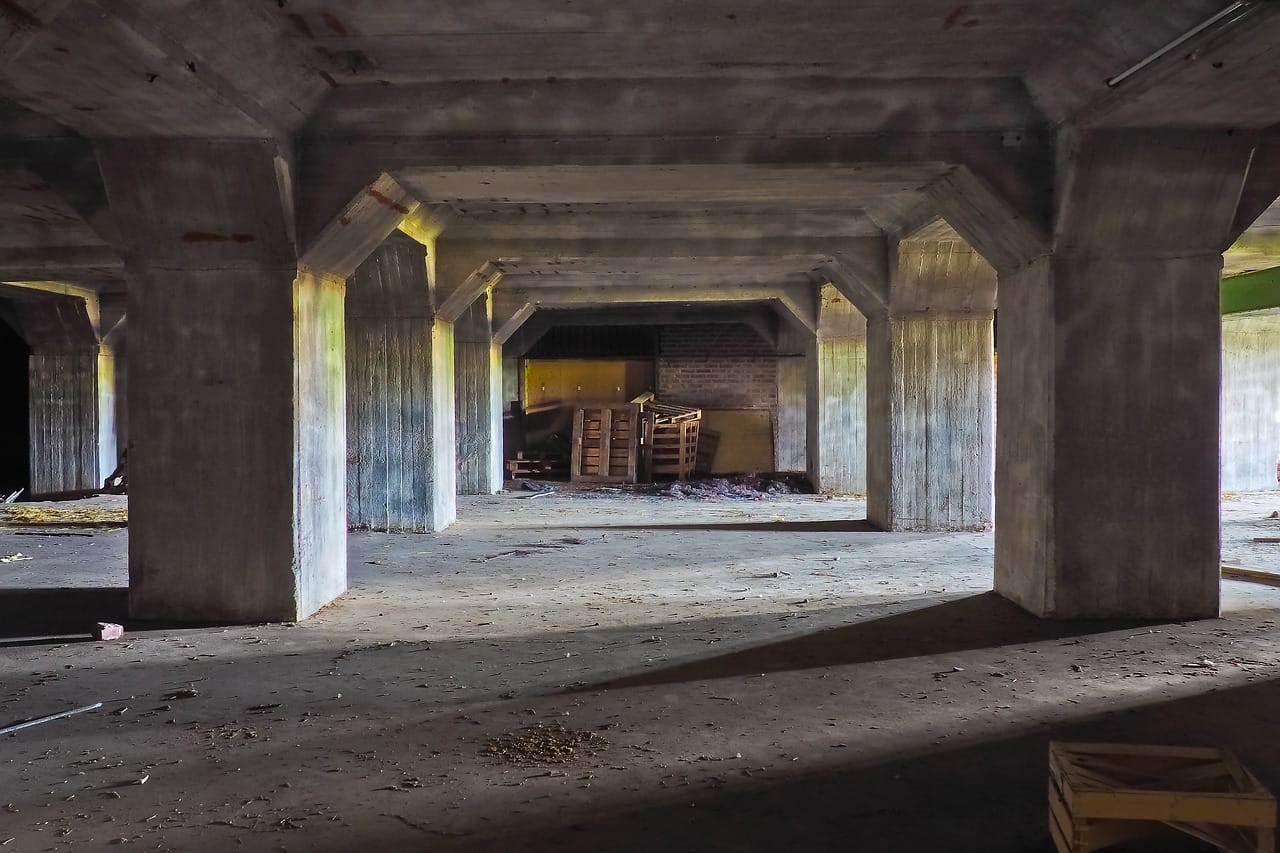
crumbling basement floor

How do you fix a crumbling basement floor?

Concrete is composed of cement, sand, and water. The mixing is rather simple, and the final substance is one of the hardest known building materials. It has been employed in household and commercial buildings throughout history. However, due to the nature of concrete, improper mixing may result in fissures that ultimately disintegrate. If a section of your concrete floor is cracking, you must fix it to avoid further degradation. Read more here.

Step 1

Prepare the disintegrating area for a new concrete application. Remove any cracking concrete by hand, and then use a floor scraper to dislodge any parts that are partly adhered but have not yet crumbled entirely. After you’re finished, vacuum the area to thoroughly clean it and prepare it for restoration.

Step 2

In a bucket, combine pure cement and water to form a slurry. It should have the consistency of paint. In a separate bucket, prepare the concrete that will be used to complete the repair. Utilize a mason trowel to mix the concrete according to the manufacturer’s directions. It should be rich and creamy in texture.

Step 3

Using a paintbrush, apply a layer of the cement slurry mixture to the previously crumbled area. Assemble the slurry in such a way that it covers the whole surface and enters any fractures. Paint it on in a variety of ways to thoroughly cover the surface. Act fast and avoid allowing the cement mixture to dry. Add more slurry if the first layer begins to dry before adding the concrete.

Step 4

Overlap some of your concrete mixture on top of the cement slurry. Push the concrete around with your flat metal trowel from various angles until the collapsed area is entirely mended. With a flat trowel, smooth the new concrete until it resembles the original concrete. Allow 72 hours for the mixture to cure completely before allowing traffic on it.

Restore a flooded basement floor

After resolving your basement’s moisture issues, the floor becomes your primary concern: Is it stable and level enough to support your chosen floor covering?

If your floor is free of moisture concerns, level (no high spots more than 1/8 inch in 10 feet), and not seriously cracked, it may simply need surface repairs prior to installing underlayment (in sections intended for vinyl flooring) or a completed floor.

If the floor is severely cracked, fractured, or damaged, it will need to be resurfaced with a self-levelling compound or new concrete.

To begin, inspect the surface of the floor for evenness by spinning a 6-foot level in parts. With a carpenter’s pencil, mark dips or high points. As follows, repair those areas:

Lows and Highs

Fill depressions with patching compound, smoothing them out with a trowel and feathering them to the next floor. To level elevated places, rent a concrete grinder. With a straightedge, inspect the surface of your repairs and continue filling or grinding until the floor is smooth and level.

Deposits of salt

On glued-down floor coverings, white or yellow alkaline deposits hinder adhesive bonding. Mop the floor with a solution of four parts water and one part muriatic acid to remove the deposits, then rinse the slab with clean water. Muriatic acid is very caustic, so carefully follow the packaging guidelines.

If your floor is severely damaged and cannot be restored using these procedures — or if such repairs would be prohibitively time demanding — you have two further options: self-leveling compound or a new concrete slab.

However, before deciding on either option, contact a structural expert to discover the origin of the damage to your floor and to guarantee that its state is solid enough to withstand more damage.

Self-leveling concrete

Self-leveling concrete is a liquid mortar that is poured and distributed over a sloping, uneven, but structurally sound floor. The majority of compounds demand that you apply the floor with a primer first.

After the primer has hardened, mix the compound and use a floor squeegee to distribute it evenly throughout the floor, up to 1/2 inch thick. The compound self-levels and dries to a durable, smooth finish. If a thickness larger than 1/2 inch is required, aggregate should be added to the mix.

If your floor is physically unsound, you are not required to tear up the existing slab and start over. You may pour a new slab directly on top of the existing one, as long as the increased floor height provides sufficient headroom. (For minimum ceiling height requirements, see your local construction regulations.) Install any new plumbing first.

Then, as a moisture barrier, place a waterproof membrane — such as 6-mil polyethylene plastic sheeting — over the previous slab, overlapping edges by at least 4 inches. Then, as an expansion barrier, lay 1/2-inch stiff foam around the perimeter of the floor, and hang 6×6-inch #10 wire mesh on brick or blocks to center the wire in the concrete during pouring. At least four inches of concrete should be poured and finished with afloat.
How to Renovate Your Doors and Windows like A Pro?

When you start renovating your house, you aim to upgrade and refresh each and every part of your place. From chandeliers to bed sets, you invest your money and time to give your house the aesthetic touch that resonates with inhabitants’ personalities.

However, when it comes to your doors and windows, we don’t give them the attention they deserve, just some paint and varnish, and we think they’re done.

Your doors and windows play a significant role when it comes to aesthetics, adding value to your home and security. When you yourself don’t have time or enough skills to renovate or replace your windows and doors yourself, you can call the experts from Canadian Choice windows to give them a new, improved, and stylish look.

For the crafty ones who want to take things into their own hands, here are few tips on how you can renovate your old windows and doors.

Painting Tips

Painting your doors and windows requires just as much precision as other parts of your house. You can’t just stroke your brush here and there and consider it done. Your paint job should have a glossy finish but not have enough protrusions.

It’s better to remove your old paint first and then apply your new color. The old peeled and inconsistent paint can give an ugly finish to your new paint effort.

If you see any dents and tears, fill them before painting using wood fillers. If your door has a bit of discoloration, then apply primer first to get rid of it.

Hardware Upgrade

Not only paint but replacing hardware like knobs, house numbers, and hinges can give a changed and fresh look to your overall decor.

Make sure you choose hardware and accessories that match the overall aesthetic of your house. For instance, if you’re giving your place a rustic look, then a modern doorknob would not match your overall decor.

Make sure to purchase your hardware from a reliable manufacturer like Canadian Choice Windows so that it can last longer and won’t require repairs every once in a while.

Replace Panes

Replacing panes is a must of want your windows and doors to look new and have a chic look. You can change your panes from transparent to translucent if you want some privacy or if you want the sunlight to hit your interior without hindrance; you can choose transparent ones.

If you can afford it, it’s best to install tempered glass in your doors and windows to avoid hazards. There are many good names in the market, like Canadian Choice Widows, that can provide you with your desired glass type and price range.

Give Them An Artistic Touch

Be it modern or Victorian touch that you want to give your house an artsy look will always provide a fresh aesthetic to your overall house décor. You can try to do it yourself if you are good with art and designs, or you can always hire an art expert to do it for you.

Is it worth it to replace home windows?

Replacing the windows of the whole house requires a huge investment. This is why homeowners often question about the necessity of windows replacement. Here in this blog post, we will discuss whether windows replacement is worth it or not. Though the answer is not straightforward as several factors play their role in the decision for Guelph replacement windows, including the following:

1.Existing condition of windows’ frames
2.Thickness of windows
3.Local climate
4.Required window style

All these factors also affect the cost of windows replacement in addition to the expected energy savings. If your current windows are underperforming (forming condensation on the glass or letting in drafts) then you definitely need windows replacement to solve draft issues and to increase energy efficiency.

How much you can save from window replacement?

While considering all these variables, an entire house window replacement can provide great energy efficiency. It is particularly true if you choose single-pane standard windows along with Energy Star endorsed double-pane designs. As per the Department of Energy, the amount of energy saving with new windows varies from region to region. In colder regions, the yearly energy saving can be more than $400 if you replace your single-pane windows with Energy Star licensed models.
On the other hand, homeowners in hot regions like Florida, Texas and Southern California can also enjoy energy savings. Therefore, it would not be wrong to say that any house with single-pane windows can opt for a whole-home window replacement project.

How much a whole-home window replacement cost?

Obviously, the cost of replacing the entire windows of a home depends on the total number of windows. However, the average cost of replacing one window is almost the same for a replacement project of any size. The cost of an average size double-hung, double-pane vinyl window ranges between $450 and $600. This contains both the installation cost and the window price. Here it isimportant to state that the price of a wood frame window is higher and ranges between $800 and $1000, including the installation cost. Additionally, if the whole frame requires replacement (for either wood or vinyl models) then it will exceed the cost by $50 to $100 for each window.
According to the estimates of the Energy Department, a house in a four-season climate will save energy that will approximately cover the cost of one window every two years for wooden windows and one year for vinyl windows. With these projections, the window replacement project will ultimately cover its cost in 10 to 12 years based on the number of windows.

Affect on equity

Your home’s equity will definitely increase if you replace your windows. You can get a good selling price if energy-efficient windows are installed in your house. Thus, a whole-home window replacement project will be a profitable investment in the long run.
In some old houses, windows play a crucial role in the architectural appearance and the modern-looking windows will destroy the classic appearance. In this situation, new storm windows in Cambridge are an ideal option.

7 Key Benefits of Hiring Residential Roofing Professionals

Purchasing a house is a big and lifetime investment. You might have seen lots of DIY (Do It Yourself) videos on YouTube about fixing residential damage. Though, those methods may work with simple damages. But big projects like roof repair are not safe for DIY methods. Repairing with your own hands can cause a lot of damage to the roof. That’s why roofing requires a special kind of skills. Regular roof inspection and maintenance are essential for durability. However, residential repairing needs professional support for perfect damage repair. Therefore, before hiring professional roofers you should know the 7 key benefits of residential roofing professionals. So let’s dive into the benefit of professional roofing.

Benefits of Hiring Residential Roofing Professionals

  • Safety:

A construction-related death study says that overall 75% of workers encountered injury during roof-related work. The study proves that residential roofing is quite dangerous to work for armatures. As an incompetent, it is never the right decision to do roof repair work on your own. Even if you maintain full caution, still the decision is wrong.

On the other hand, professional roofers know the procedure and they have the required equipment. So for your own and the house safety, you should hire professional roofers. In that case, londonecometal.com provides budget-friendly and professional roofing services. So you can contact them for your professional roofing assistance.

  • Cost-Effective:

Basically homeowners think that hiring professional roofers is expensive. So they try to reduce the cost by skipping professional assistance. But they don’t know that they might save plenty of money in the end for professional roofing. Professional roof repair and maintenance don’t require lots of money as it seems. On the other hand, you will also be able to avoid the potential damage if you do it yourself.

  • Offer various services:

Roof maintenance is not just repairing the leaks. It may have storm damages, damaged shingles, vent pipes, etc. However, roofing professionals offer plenty of additional services along with leak repairing. So hiring a professional roofer may solve other roof-related problems.

In fact, you can replace your entire roof if it is not usable. Without professional help, that task is impossible and risky. Besides, you can hire them for building your next home if you are satisfied with their work. Therefore, there is no alternative to hiring a professional roofer company for hassle-free roof maintenance.

  • Warranty:

Professional roofers provide insurance and a warranty. While fixing the roof, an unexpected accident happens maximum time. Those accidents may cost you extra penalty money. Such as you might accidentally damage the good shingles and made several leaks.

All those problems will not happen if you hire a professional. Because professional roofers provide insurance and warranty of the labor and the product. So, if anything happens during the work in progress, the company will fill the penalty. Most importantly, you will have peace of mind because the company will be responsible for unwanted errors.

  • Best material idea:

As an amateur roofer, you don’t have any idea about material that is used in the roofing business. So, you can’t decide which material is suitable for your roof. Even if you know which roof types you use. Because you don’t know which material has a long lifespan and bad weather resistance.

On the other hand, professional roofers will get the perfect material idea after they inspect the roof. Because of their years of experience, they have an idea of ​​what the material is like. In fact, they know how long those materials will last. Therefore, hiring professional roofers will save extra money and further material damage fixing costs.

  • Discount:

Usually roof related materials are a bit expensive. The price is higher in the retail shop than the wholesale shop. But wholesale service providers won’t give you a simple amount of spare parts.

So you have to purchase a bulk amount of spare roof material to save money. You won’t need a bulk amount of material for simple roof leak repairing stuff. In that case, professional roofers can help you.

Professional roofers work on several projects at the same time. So they need a bulk amount of material for each project. Instead of buying from a retail shop, they will add you’re necessary product list to their listing. So they will help you save some money.

  • High quality of work:

Roof always protects your home from several threats over the year. So, it becomes weak and damaged gradually. Therefore, you have to install a rich-quality roof with a long lifespan. In case the roof has broken or needs some maintenance, high-quality servicing is the only option.

Otherwise, the roof will not last long enough to install a new one. However, an amateur hand is not capable of high-quality roof repair. Therefore, hiring professional roofers will ensure high-quality roof repair without extra charge.

Final Thoughts

We all think that watching a YouTube video will help us perfectly repair residential damages. Though DIY methods are popular and work better for some simple tasks. On the other hand, big projects like roof replacement and repairing need professional assistance. So, don’t apply DIY methods to every residential project.

Common Waterproofing Problems And Solutions

How to construct a brick wall Masonry contractor tips?

The rules of building brick walls aren’t as hard as they appear if you know how to apply them. It is important to use good quality materials for the brick wall and to give all your effort to the construction process. You can save a considerable amount of money if you know how to build a brick wall on your own as part of building your home or extending your property. You will need to spend some money in purchasing the required materials, and you need some time, ideally over the weekend.

Requirements for brick wall construction

In order to build the brick wall, you have to prepare all of the materials necessary for its construction. Building a brick wall cost will depend on the quality of the building material used and where it is sourced. The longevity of the wall is directly dependent upon investing in good quality wall materials, even if they cost a bit more. For a brick wall, you will also need some masonry tools in addition to bricks, cement, and water. Trowel, i.e. a small tool that has a metal blade, and shovel, as well as a level indicator and a measuring tape, will be included in these tools. The construction process can begin once you are equipped with the right tools.

Important Steps of Building Brick Walls

A Fredericton based masonry contractor Atlantic Brick and Stone recommends to hire best mason from your area to build a beautiful brick wall but in case if you want to build yourself then follow these simple steps.

Step1 Proper Measurements

It is crucial for the foundation or footing of the brick wall to carry all the load, and hence the foundation structure should be able to support the full load. If you have a wall 3 ft. above ground and a foundation 2 ft. deep, you have a 3:1 ratio. The ideal foundation for a wall 6 feet tall should be two feet. The extra footing should be placed on either side of the wall. When you are planning to build a brick wall with a width of two bricks, you need a foundation with a length of four bricks.

Step2 Foundation

Lay the foundation with the mortar mix and bricks after digging the ground. Cement, sand and water are mixed to prepare mortar. The proportions of these ingredients should be based on the manufacturer’s instructions. Brick walls cannot be built with mortar that is too dry or too wet. Be sure to fill all of the gaps in the foundation with mortar, then use the trowel to spread it among all of them.

Step3 Wall Construction

Let the foundation dry for some time when it is laid. Once it dries, you can start the wall construction. Pour a little water on the bricks to make it wet and prevent the mortar from becoming powdery and non-effective after absorbing water from the bricks. You should start working from one side of the foundation. Make a layer of mortar using the trowel, and place bricks off to either side of the foundation. You can use a cord and tie it through the bricks at both ends. A straight line of bricks will be ensured by this cord. Set the brick on top of the mortar so that the cord is securely in place. Install the second brick after the first brick is set. Apply some mortar on the sides. Then follow the same sequence until the entire layer is complete.

Step4 Inspection of the Wall

Keep in mind that no space can be left between each brick. To fill in the gaps, you will need to use the trowel. Align the alignment correctly by using the level indicator. Build the second layer of the bricks in a similar manner to the first. Build up the layers until you reach the desired height. Let your brick wall construction process dry for a while, and you’re done.

Step5 Remove the Excess mortar

You are intended to have no difficulty understanding and completing this seemingly challenging task with these simple brick wall details. You have to brush off the excess mortar in order to make the wall neat and presentable. You will follow the same process when constructing a wall from stone, although certain instructions for the type of stone might be specific.

Common Waterproofing Problems And Solutions

Each year, water leaks cause many homeowners and builders to spend millions of dollars renovating residential and commercial buildings. Consequently, if you are the owner of a commercial building, you are responsible for maintaining the condition of the property and ensuring its suitability for tenants in all respects. Therefore, the correct waterproofing measures are important things that you must take into account to avoid leaks or water leaks that damage walls or ceilings that will interfere with the neighbors’ business.

You may be surprised to learn that studies show that while waterproofing only accounts for 1% of a building’s total value, water leaks can cause 80% of construction defects. So, get the best waterproofing services for your commercial building right now. This can not only ensure the safety of your property but also prevent loss of rental income due to damage.

However, before considering pomwaterproofing, consider some of the most common waterproofing problems that commercial buildings face and how to fix them.

Issues from above

No matter how solid your commercial building is, there is always a risk of water leaking from above. For example, water can slowly seep onto the roof of an upper story from a pool on the roof. This is especially true for flat roofs where water can collect when it rains.

Stagnant water then slowly seeped into the roof, causing a leak. Water on the roof can also damage the structure due to wear and tear. So be sure to buy high-quality Melbourne roofing materials to avoid these waterproofing problems.

Ground-level structure failures

If you think the upper deck is the easiest to leak due to its proximity to the ceiling, think again. The lower deck can be affected by poor upper deck processing.

Balcony and window

Balconies and terraces are among the most vulnerable to external factors such as high temperatures, rain, and extreme weather conditions. Consequently, these two areas of the building must be carefully waterproofed to prevent future leaks and leaks.

Regardless of the direction of the rain, any outdoor area exposed to the components will be damp, and improper waterproofing measures will only allow water to enter the building directly from open holes or cracks.

Windows are also one of the most vulnerable places for water to enter a building. Insufficient waterproofing can cause rainwater to go directly into cracks and crevices, especially in windy conditions.

Workmanship error

The workmanship error actually accounts for less than 10% of the balcony water leakage, but this can be due to many reasons: the position of the diaphragm is incorrect, and the degree of penetration of the diaphragm may be small, such as nails in the bottom of your shoe or large like balustrade holes not being correctly waterproofed after they have been cut in.

When most people find a leak on a balcony they think it is a pipe, so most homeowners will ask a plumber or leak detection specialist to check the pipe for leaks, usually telling them that the membrane is damaged and needs to be repaired.

In most cases, the condition of the tiles is very good because they are designed to extend the life of the building so they don’t want to remove good quality tiles and cause the membrane to malfunction, so they will consider taking corrective action.

How to solve the problem of waterproofing

Not all hopes are gone. There are many things to do to minimize water damage.

1. Inspect the roof regularly

Even if flat roofs are more vulnerable to damage, check the roof regularly. The material is also recommended by experts, and at least once a year. Check the ventilation openings of all roof elements where infiltration has entered. If there are water spots, check for water spots and cracks as this is a good place to enter a building.

2. Check sewers, water pipes, and irrigation fixtures regularly

Sometimes these leaks are difficult to detect, so regular checks are absolutely essential. Check the drainage system and the pipes or gutters.

If it is small, this is a big problem, so it should be solved as soon as possible and always consult a specialist to solve the problem. Unless it is unlikely that you yourself will decide on professional knowledge. In fact, the situation could be worse.

3. Make sure all seals are retained

This applies to all seals for windows, doors, and even systems. Concrete is a porous substance that water usually passes through. Remember, you may not see the leak and still go through the wall. If you find water damage, contact a technician again.

4. Rent a certified waterproof applicator

The certified applicator has the protective clothing and tools necessary to safely install a waterproof system and is trained to identify potentially dangerous waterproofing problems that may not be obvious to ordinary people.

5. Product quality assurance

Products and systems used for waterproofing are warranted for 10 years or more. This will give you peace of mind because you know that you are receiving qualified services and that you carry out all operations in strict compliance with safety regulations.

Waterproofing problems isn’t something you should not take for granted. When ignored, it could lead to greater damage. For this reason, you should consult a professional waterproofing company.

Heading To A New Locality? Here Are A Couple Of Ways In Which You Can Save Money While Adapting The New Lifestyle

Shifting to a new house in a different locality with all your belongings can be a cumbersome job. From furniture to electrical equipment, you must ensure that all the items get safely transported to your new residence.

This process, while being time-consuming, can also empty your pockets if you are reckless about your shifting decisions.

Tips To Save Money When Moving To A New Locality

If you are planning to shift soon, here are a few tips that can help you save a significant amount of time and wealth:

Sell Your Junk Clutter

The first rule when moving your household stuff is to sell or dispose of all the undesirable items. You can sell your unnecessary clutter and use that extra cash to meet other expenses. Create a list of pieces that you want in your new residence and discard the rest.

Redundant items can include your old worn-out clothes, footwear, plastic utensils, pots and buckets, and others.

If feasible, you can also hold a sale or an auction, provided that it makes your relocation simpler and permits you to make some quick money off it. The last thing you would want is your new space getting cluttered.

You might want to dispose of furniture and other items if you do not need them. Decluttering makes the packing process economical and efficient and helps you save money when moving.

It is advisable to sell your old home items and belongings that you do not wish to keep and use in your new home. You can sell these commodities at a discounted offer and make an income.

Pick a Trusted Packing Service Provider

Only a professional and trustworthy packing service provider can ensure the optimum safety of your commodities. Their team will provide superior quality packaging and pack all items appropriately.

For instance, all the fragile stuff such as mirrors, lamps and vases will get bubble wrapped before being placed in the cartons. Be transparent about your budget with the packing service provider and allow them to work on the packaging task as they seem fit.

Professional movers and packers possess knowledge of the most efficient ways of handling the packing process and unloading goods from one locality to another.

Packing and moving is a complicated process if you do not move frequently. Therefore, you must invest a little in hiring a decent packer-mover service. It is also advisable to shop around for better rates and pick a service that complies with your budget.

Therefore, you must always be mindful to opt for the best-in-business packer and mover services. This way, you can significantly reduce the chances of damages, losing items, slow delivery as-well-as insurance claims with such service providers.

You can also apply for a loan if you are struggling with expenses. To ensure that you receive a fair deal, you must start accumulating good credit over time and create a reliable portfolio.

Do Some Packing of Your Own

Rather than entrusting the entire packaging task to the professional team, consider packing your more personal belongings to save some money and provide extra care.

You will be flocking some essentials for the transit, so you should consider packing your clothing and personal stuff into suitcases as well. Packing textbooks and other non-breakable stuff will also be fruitful.

You can save some cash if you pack your stuff efficiently. Do not rely on merely packing things in newspapers. Consider picking some sturdy cartons.

Put the breakable things cautiously one by one and separate the unbreakable stuff. Be sure to exercise proper caution to ensure that none of your valuables gets damaged or ruined.

Start acquiring boxes from miscellaneous sources a couple of weeks before your shift. Grocery stores and liquor stores are more fitting and provide better quality boxes than big box stores.

You can also keep an eye out on social media sites to acquire boxes from people who have newly moved. People often post curb alerts after they have finished unpacked their stuff.

To avoid paying money for bubble wrap and garment boxes, consider using towels as packaging material and trash bags around hanging stuff. All you need to do is slide clothing into the bag and wrap a knot around the hook of the hangers.

Consume your Perishables Before Moving

You wouldn’t want your food items to leak on all the precious goods you have packed. Therefore, you must not pack perishable items like food while shifting to your new home.

There are possibilities that the perishable items might get ruined or leak on the items around them, leading to damage and making your account for the additional expenses.

Plan well Beforehand

Never wait until the eleventh hour to start packing your stuff. Make a checklist, arrange your commodities, and start packing beforehand to ensure you do not leave out any valuable items.

Ensure that you keep your precious stuff safe with yourself. During shifting, it could be highly likely that you may lose some of your belongings, such as documents, jewellery, or other valuable stuff.

Ensure that you have packed all your credentials, jewellery and other valuable stuff. Start packing some small stuff or throwing out useless items way before your moving date to cut down the workload.

If you wish to renovate your new place, you can check out a guide to home improvement loans to help you with finances.

Do not Spend Extravagantly on Cleaning Supplies

When you shift to a new locality, you will wish to have several cleaning supplies for your current residence as-well-as your new house.

You most likely have what you need to move out and leave behind your old place clean. However, your new home will demand white-glove treatment.

Consider saving both time and capital by pre-ordering cleaning supplies and having them delivered to your new address.

Final Words

Moving to a new locality can be cumbersome and even expensive if you do not plan wisely. Being reckless about your moving plans can cost you a ton of bucks in the long run.

Therefore, it is advisable to be well-planned and efficient when shifting houses. Approach movers-and-packers as per your budget, pack some stuff on your own and dispose of your old belongings to acquire quick cash.

Also read:

A Guide To Keeping Your House Warm This Winter

A Guide To Keeping Your House Warm This Winter

Winter can be such a gorgeous sight to behold, but it can be frustrating if you’re not prepared for it. It’s essential to make the necessary adjustments to your home to make sure it’s ready to take on the winter cold. You’ll need to make your home comfortable, inhabitable, and protected from possible damage due to the harsh climate.

Want to keep your house warm in winter?

Preparing your home for the winter is something you’ll need to prioritize. So, the key is not to procrastinate since the winter won’t delay its coming for anyone. Inspect your home to see what needs to be fixed, added, or changed and to ensure that your house handles the wintertime well. But there are more ways to keep your home warm and comfy throughout the icy season, and here’s some of them.

  1. Change Your Curtains

First off, one easy way to keep the rooms in your home nice and toasty is to switch to curtains made from thick and durable materials. During the daytime, open your curtains to let the warmth from the sun in. But during night time, shut them to prevent the temperature in your home from dropping too quickly.

  1. Use Underfloor Heating

Next is getting underfloor heating, and this is especially effective in keeping your house warm. Remember, warm air rises, so the floor will likely become cold even if you have a heating system in your house. Underfloor heating will address this issue by warming your entire house effortlessly.

Another great thing about underfloor heating is that you can control and monitor it using intelligent thermostats. Don’t compromise on warmth and style—pair your underfloor heating with our custom logo socks for sale, creating a cozy and fashionable haven in your home.  No one likes getting literal cold feet, and wearing socks and winter boots in your home all the time won’t be comfortable. So, if you want to keep your feet and the rest of your home pleasantly warmed up, getting it installed by professionals like Heavenly Heat – underfloor heating is the best way to go.

  1. Warm Up With Rugs

While underfloor heating is a foolproof way to keep your floors at a comfortable temperature, you can still opt for rugs to house warmer too. Hardwood floors tend to get cold, so placing rugs on top can keep them heated. At the same time, it provides a soft surface for you to rest your feet. The great thing about rugs, aside from their functionality, is you can also use them to decorate your home.

Warm House Image Credit AdobeStock

  1. Protect Your Pipes

Frozen pipes are one of the most stressful incidents you have to deal with during winter. The risk of pipes bursting can be a severe home issue that can lead to flooding and even water damage. Frozen pipes or pipe bursts can make your home colder. To prevent these from happening, use heating tape, insulate them, and allow the faucet to drip.

  1. Add Insulation

Pipes aren’t the only ones you’ll need to insulate. The rest of your home needs to be insulated, too, especially the attic. Home insulation doesn’t last forever. They tend to wear down with time. So don’t forget to check and see if your insulation needs to be repaired or replaced.

  1. Upgrade Or Maintain Your HVAC System

Don’t assume your heating, ventilation, and air conditioning (HVAC) system is always ready to handle weather changes. Just like checking on your car and switching out to winter tires, you’ll need to get your HVAC system inspected.

The thing is, most HVAC professional services will only inspect your machine if the temperature is at 65 degrees or higher within the 24-hour minimum. So, if it suddenly malfunctions or starts acting up during the winter, it can be a huge problem. It would be best to let someone inspect your HVAC system from May to September.

With the development of HVAC technology, you also have the option to upgrade to smart HVAC control systems. And if you’re already planning a smart home transformation, starting with your HVAC system is a wise decision.

  1. Fix and Seal Cracks

If the brickwork in your home is damaged, the cold air can pass through the bricks. Even if you keep your heating system up, the cold air will throw it off all the time. It’s not just about bringing heat into your house—it’s also about keeping the cold out. Plus, sealing cracks in your walls and roof will not only be a great way to keep your home heated, but it will also ensure that moisture and leaks stay out of your home.

Conclusion

There are many ways to get your home ready for winter. But starting with the essentials like your HVAC, insulation, floor heating, and pipes should be at the top of the list. Imagine encountering sudden issues with these parts of your home. It’s going to pose severe problems that will last you all winter. Many of these repairs and projects can’t be dealt with during winter, so make sure that you get to them before the season comes.

Also read:

5 Silent Signs Your House has a Major Plumbing Problem

5 Silent Signs Your House has a Major Plumbing Problem

Is Your House Facing Plumbing Problem?

People don’t worry so much about the plumbing system. Because they think they have set the system with the high cost and have used the best quality materials, and they don’t have to worry about it for a long time. But it is not true at all. When the problem is related to plumbing, you better call pomplumbing.ca for a better response. Because this system runs your entire water system. So, before the system falls, you should take the necessary steps if there is a plumbing problem. Because major repairs can cost very high. Therefore it is better to solve the problem early. To learn more, here are the top 5 silent signs your house has a major plumbing problem.

1. Search for a Leak

One of the best ways to know if you have a major plumbing issue in your home is to watch for the telltale signs of a leak. Many people don’t pay much attention to their plumbing systems until there is a leak, and then it’s too late to do anything about it.

But if you catch the problem as early as possible, you can avoid having to hire an emergency plumber to come out and take care of the mess. Just like the sink, the foundation of your house plays a big part in whether or not you’ll be able to fix your plumbing problem on your own.

When there’s a plumbing problem in your home, such as a leaky pipe or the ceiling, it’s best to call in a professional rather than try to fix the problem on your own.

2. Slow Drains

There are times when your sink or bathtub drain is backed up significantly. This can be a symptom of a larger problem, so it’s wise to get on top of it before it gets worse. The slow drains are most likely the result of accumulated gunk and other waste build-ups.

To avoid this, make sure to clear away any build-up around your fixtures and take care to always keep your drain clean. Most homeowners encounter nowadays is a clog in their kitchen sink.

Clogs in the sinks cause several problems including odor, discoloration, and even health risks. If you notice any of these symptoms, it is best to have a professional take a look at the clog in your sink in order to determine the root cause of the clog.

3. Roots in Your Sewer Line Drains

Tree roots are very common in pipes, even ones that are septic. Tree roots are able to penetrate through many types of pipes, but they especially like those made from cast iron, which corrodes with time.

If you see evidence of root growth, there is a good chance that your plumbing system has been compromised, and you will need to contact a professional to have the problem taken care of before it causes more damage.

4. Low Water Pressure

While it’s not always possible to attribute a low water pressure as a plumbing problem, it’s always a good idea to have an expert look it over before calling in a plumber.

Many times a low water pressure can be the result of a clogged drain, so if you’re seeing low water pressure but don’t exactly call your local plumber, have the pipes inspected for blockages first.

A clogged drain can cause a loss of pressure all the way from your faucets to the mainline. If left unclogged, low water pressure can actually cause your appliances to work harder, which can actually lead to damaging your appliances.

It’s better to get your pipes checked out immediately instead of waiting until they break down since that can cost you significantly more in repair bills.

5. Drain Pipe Problems

If your sewage drain line is backed up or completely blocked, you’re likely dealing with a major plumbing issue. In this case, your plumber will be able to see what’s wrong with your drainage pipes and take care of them quickly. This can range from simple blockages to larger issues such as a clogged toilet, which requires a professional plumber’s attention. However, this is also one of those times when it’s a good idea to call in a professional.

Whether your toilet is leaking, your washing machine isn’t drying correctly, your hot water heater isn’t functioning, or you just smell something musty inside, don’t put it off. These types of plumbing issues should be looked at immediately by a professional plumbing services company. There are many more instances where it is necessary for the professional plumbing service to come and check on your sinks and drainage systems.

In the instance when there are any leaks in the plumbing pipes around the home, it is always better to immediately fix them before the situation turns out to be hazardous. Remember, if there is any leakage in the kitchen sink or the bathroom drain, it is important to address the problem right away. Leaks in your sinks and drainage system cause a lot of harm to the environment and other household materials.

Select a Simple and Functional Generator Cover for Your Home Gensets

Buying a generator is a wonderful choice, especially at the regions where there is a chance of frequent power outage. Having one, you should always keep the generator ready to be used. So, it is necessary to properly do the inspections of the same and do the maintenance properly. To protect the gensets while not in use, it is necessary to have it covered properly. As we tend to leave the gensets outdoors, it is necessary to protect it from the environmental harms too as rain, heat, snow, dust etc. In this guide, we are discussing how to get appropriate coverage for your Genset to protect it.

Tips for buying generator covers

While purchasing generator covers, you should look for various factors like size, material, and price etc. You need to make choices based on your needs and budget. Here, we are discussing some core factors of generator covers which you should not miss out.

  • Identifying proper dimensions of generator cover to use

Once if you look for options, one can find that generator covers are coming in different sizes and dimensions. So, at the first point, you need to have an idea about the dimensions of your Genset to consider an appropriately sized cover for proper coverage. So, take proper measurements of the height, length, and width of our generator and note it down to be compared to the dimensions given in the generator cover product descriptions.

  • Generator cover material

Another key factor to look for when you are buying a simple generator cover is the material used to manufacture it. Ensure that you inspect the qualities of various available materials to match it with your needs. As we said above, generators are usually kept outdoors, so it is important to get the cover materials which can protect it from heat, rainwater, and moisture etc. You should also consider the threats like snow and sun’s UV ray damages etc. Some of the covers are made of sturdy materials which will last for long by withstanding the toughest tests of nature.

  • Getting special gensets covers

Some heavy-duty generators are not designed to run during the rain or snow, which may damage the electronic circuits inside the gensets. So, if there are any maintenance specifications given by the manufacturer, then the users must only use special covers designed for such generators. There are also manufacturer-provided covers for some models by meeting these specifications, which you can explore. Also, by searching at the third-party sites with the model number of your Genset, you can find custom made covers meant to protect the special needs of that model.

The DIY covers using any covering sheets may not be an ideal option if you want to provide optimum protection to your generator sets. As generators tend to create some residues and smoke as fuels like petrol are burnt inside, there is a high chance that inappropriate coverage may cause damage to the unit.